At BerqWP, we’re all about delivering faster, smoother, and better-performing websites. That’s why we’re excited to introduce Cloudflare Edge Cache integration!
In this guide, we’ll break down everything you need to know about Cloudflare Edge Cache—what it is, how it works, whether you can use it, and how to set it up in just a few minutes. Don’t worry, no technical experience is required!
What Is Cloudflare Edge Cache?
Imagine your website’s content being stored in multiple locations worldwide, ready to load from the server closest to your visitors. That’s Cloudflare Edge Cache in action.
Instead of relying on a single server—often located far from your audience—Cloudflare uses its global network of edge servers to cache and deliver your website’s content efficiently.
Why does this matter?
- Faster Load Times: Your website’s content reaches users in a flash, regardless of where they are.
- Improved User Experience: Speedier websites keep visitors happy and engaged.
- Better SEO & Core Web Vitals: Faster websites rank higher in search results and pass important performance metrics like LCP and INP with ease.
Can Your Website Use Cloudflare Edge Cache?
Not every website is automatically eligible for Cloudflare Edge Cache. Here’s what you’ll need:
1. Your Website Must Be Using Cloudflare
To use Edge Cache, your site must already be connected to Cloudflare. If you’re unsure, follow these steps:
- Visit NS Lookup and enter your domain name.
- Check the NS Lookup section. If you see the Address entries like
ns.cloudflare.com, congrats—your site is on Cloudflare!
2. Cloudflare Account Details
You’ll also need three pieces of information from your Cloudflare account to enable Edge Cache:
- Global API Key
- Zone ID
- Account Email
How to Set Up Cloudflare Edge Cache in BerqWP
Integrating Cloudflare Edge Cache with BerqWP is easy. Here’s how:
Step 1: Retrieve Your Cloudflare Account Details
- Log in to your Cloudflare account at dash.cloudflare.com.
- Go to your Cloudflare dashboard and gather:
- Global API Key: Under “API Tokens” in your “My Profile” settings.
- Zone ID: Found in the “Overview” tab > domain name.
- Account Email: Your Cloudflare login email.
Step 2: Connect Cloudflare to BerqWP
- Log in to your WordPress dashboard.
- Navigate to BerqWP > Integration tab.
- Enter your Global API Key, Zone ID, and Account Email in the provided fields.
- Click Connect Cloudflare.
Step 3: Verify the Connection
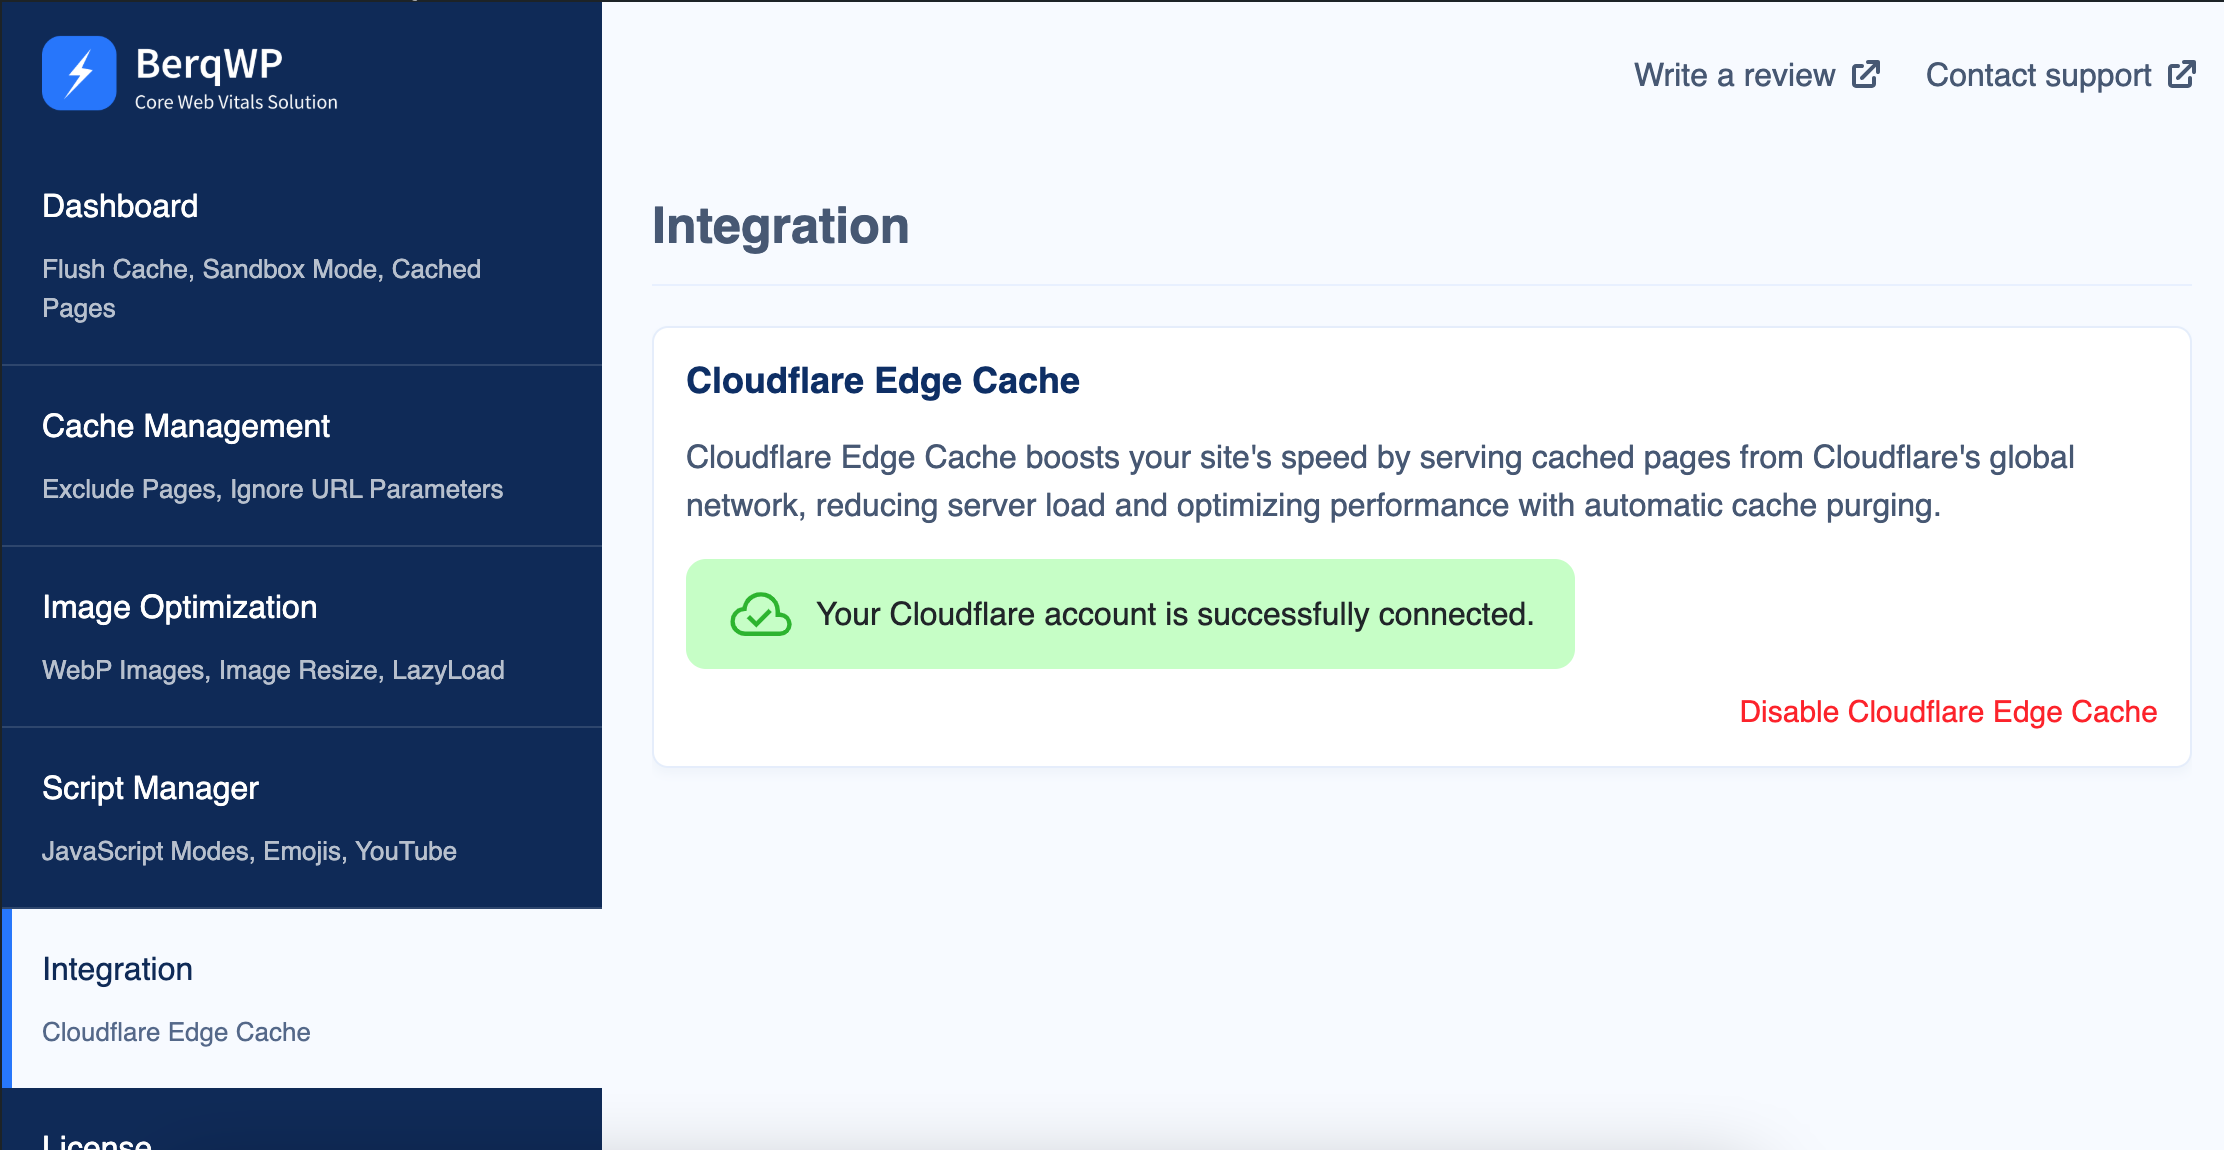
Once connected, you’ll see a message confirming the integration. BerqWP will automatically set up cache rules to enable Edge Cache on your website.
BerqWP CDN vs. Cloudflare Edge Cache: What’s the Difference?
Both BerqWP CDN and Cloudflare Edge Cache use Cloudflare’s infrastructure but serve different purposes:
BerqWP CDN (Automatic)
- Delivers static files like images, CSS, and JavaScript through Cloudflare.
- Requires no setup—it’s enabled automatically with BerqWP.
Cloudflare Edge Cache (Manual Setup)
- Caches your entire website (static + dynamic content) on Cloudflare edge servers.
- Requires integration with your Cloudflare account.
Think of it this way:
- BerqWP CDN = Basic level of speed optimization for static files.
- Cloudflare Edge Cache = Advanced caching for full website optimization.
Why Use Both?
Pairing BerqWP CDN with Cloudflare Edge Cache ensures maximum performance:
- Static Files: BerqWP CDN keeps them light and fast.
- Entire Website: Cloudflare Edge Cache ensures everything is served from the nearest server to your visitors.
By enabling Cloudflare Edge Cache with BerqWP, your website gains a noticeable performance boost—better speeds, better user experience, and better search rankings. What are you waiting for? Set it up today and enjoy the difference!
